
Introduction
In recent years, cake in a jar has become a popular trend for both home bakers and small businesses. These individually packaged cakes are not only adorable but also convenient, making them perfect for events, gifts, and even as a unique product for selling. Whether you’re a seasoned baker or just starting out, making cake in a jar offers an opportunity to share your baked goods in a new and exciting way. In this article, we will walk you through how to make and package cake in a jar for selling, from baking to branding.
Why Cake in a Jar?
Cake in a jar is a creative twist on traditional cake offerings. Its popularity has soared because it provides several advantages:
- Portability: Perfect for people on the go, cake in a jar is an easy, mess-free way to enjoy a slice of cake anywhere.
- Personalization: You can offer different flavors, fillings, and toppings in the jars, providing customers with a custom experience.
- Shelf stability: When packaged correctly, cake in a jar can last for several days, making it ideal for gift-giving and events.
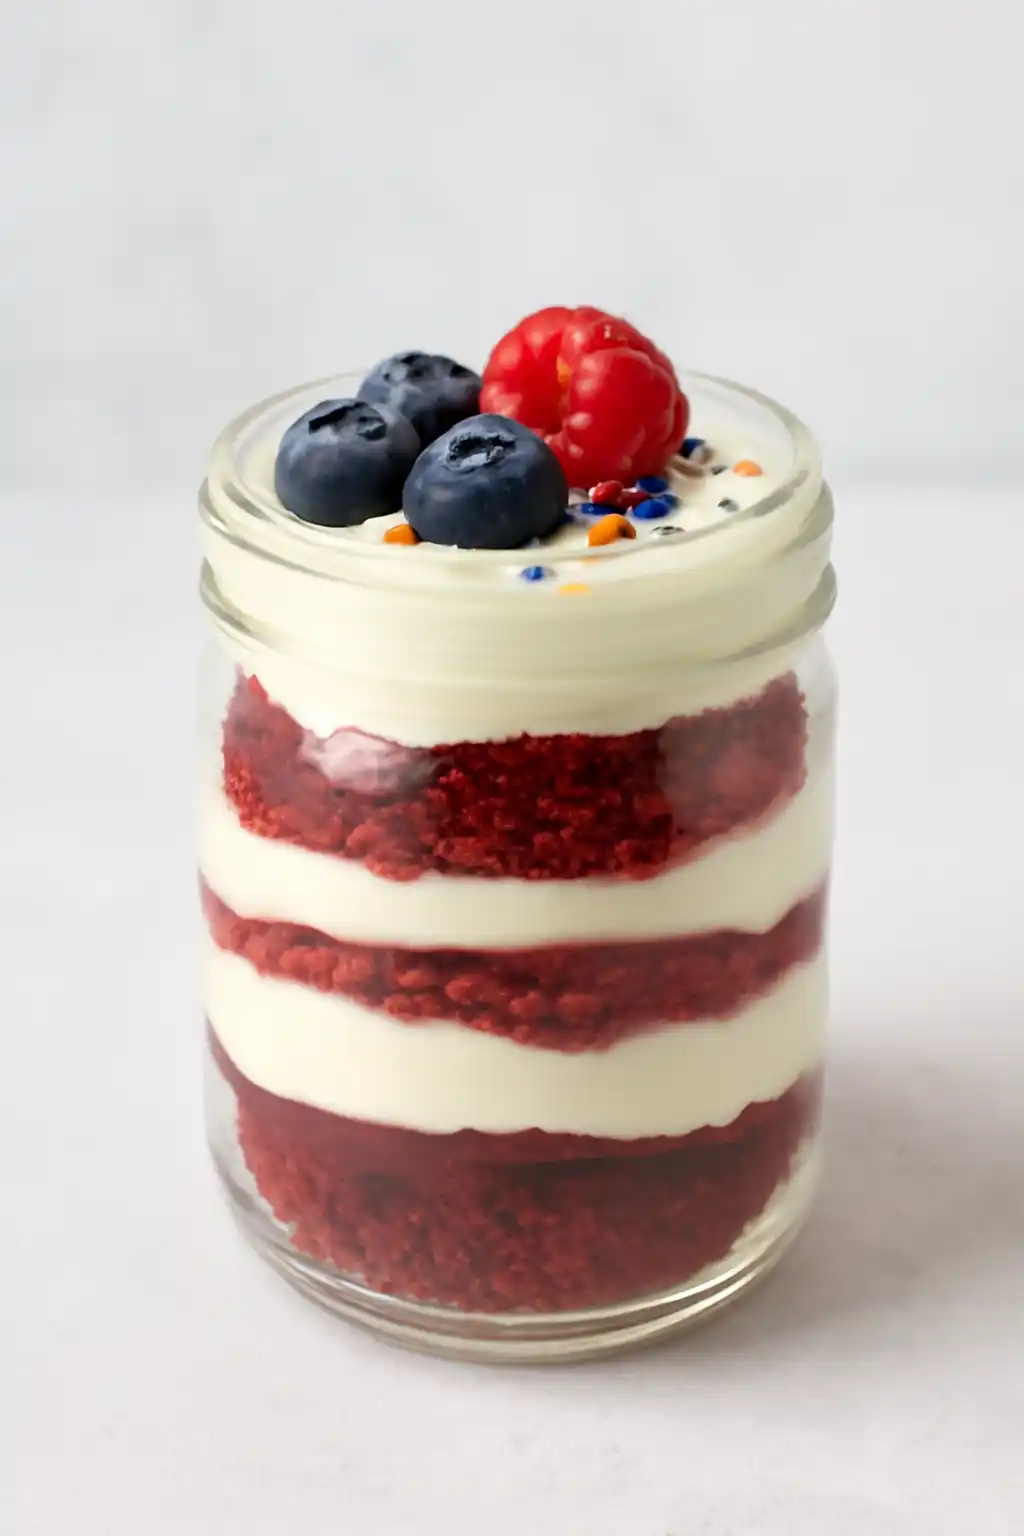
- Visual appeal: The transparent jar allows customers to see the layers of cake and filling, which adds a unique and enticing look to your product.
Cake in a jar also allows for creative marketing opportunities. You can make themed cakes for holidays, birthdays, or weddings, and customize the jars with ribbons, labels, and other decorations.
Step 1: Choosing the Right Cake Recipe
When making cake in a jar, you need a recipe that holds up well in the jar and remains moist even after being sealed. Here are some good options:
- Pound cake: Dense and moist, it’s ideal for layering and holds up well in the jar.
- Chocolate cake: Rich and flavorful, chocolate cake pairs well with a variety of fillings and toppings.
- Vanilla cake: A versatile choice that can be paired with different flavors of frosting or jam.
- Carrot cake: Moist and flavorful, it works wonderfully with cream cheese frosting.
For a more luxurious cake in a jar, you might also consider using flavored cakes, like lemon, strawberry, or red velvet, and offering unique fillings like custard, mousse, or whipped cream.
Step 2: Baking the Cake
To bake cake in a jar, you’ll want to bake the cake in standard cake pans first, as you normally would. Once cooled, you can cut the cake into small pieces or layers that will fit inside the jars.
Tips for successful cake baking:
- Bake smaller layers: Consider baking thinner layers of cake so you can cut them into pieces that fit perfectly into the jars.
- Even baking: Ensure that the cake is baked evenly, as uneven layers can affect the presentation of your jarred cakes.
- Cool the cake completely: Let the cake layers cool completely before assembling in the jars to prevent the cake from becoming soggy.
If you want to offer multiple flavors, bake each flavor in a separate pan, then layer them in the jars for variety.
Step 3: Prepare the Fillings and Frosting
Now that the cake is baked, you’ll need to prepare any fillings or frostings to go between the layers. For cake in a jar, it’s important to use fillings that are not too runny, as this could cause the cake layers to become soggy. Here are some ideas for fillings and frostings:
- Buttercream frosting: Smooth and sweet, buttercream is a classic choice that pairs well with almost any flavor of cake.
- Whipped cream frosting: Light and airy, whipped cream provides a refreshing contrast to richer cake flavors.
- Fruit preserves or jams: These add flavor and color, and they can help moisten the cake layers.
- Cream cheese frosting: Especially great with carrot or red velvet cakes, cream cheese frosting is tangy and rich.
- Ganache or chocolate mousse: Perfect for chocolate cakes, ganache adds a luxurious touch.
Make sure your frosting or filling is the right consistency. It should be thick enough to stay in place but smooth enough to spread easily.
Step 4: Layering the Cake in Jars
Layering the cake in jars is where the magic happens. Here’s a step-by-step guide to layering the cake:
- Choose your jars: Select small, wide-mouth mason jars or clear dessert jars with lids. These jars should be large enough to hold a few layers of cake but small enough to be easily handled and sold.
- Start with frosting: Spoon a small amount of frosting or filling into the bottom of the jar to create the first layer.
- Add cake layers: Cut the cake into small, even layers that fit inside the jar. Use a spoon or your fingers to gently press the cake into the jar, ensuring it stays even and doesn’t collapse.
- Add another layer of frosting or filling: Continue layering frosting and cake, making sure each layer is evenly spaced and the cake is firmly packed in the jar.
- Repeat the layers: Layer until you reach the top of the jar, leaving a small amount of space at the top for the lid.
If you want to add a decorative touch, you can pipe a swirl of frosting on top or add fresh fruit, sprinkles, or other small toppings.
Step 5: Sealing and Packaging the Cake
Once the cake is layered in the jar, you can seal it with a lid. Be sure the lid fits tightly to keep the cake fresh. Here are some tips for packaging and presenting the jars:
- Seal properly: Make sure the lid is on tightly to preserve freshness and prevent spillage.
- Add a decorative touch: Tie a ribbon around the jar, attach a label with the cake flavor and ingredients, or add a tag with a personalized message.
- Consider packaging: If you’re selling the cakes, consider creating a small box or protective packaging to prevent the jars from breaking during transport.
Labeling the Cake Jars
If you plan to sell cake in jars, labeling is essential. Include the following information on the label:
- Cake flavor (e.g., chocolate, vanilla, carrot, etc.)
- Ingredients (for customers with allergies)
- Expiration date (important for cakes with fresh cream or fruit fillings)
- Storage instructions (e.g., refrigerate if necessary, or consume within a certain period).
Step 6: Selling the Cake Jars
Now that your cake jars are baked, decorated, and packaged, it’s time to sell them! You can sell cake jars online, at local markets, or at special events. Here are some ideas for marketing and selling your cake in jars:
- Offer a variety of flavors: The more options you have, the more likely customers will find something they love. Consider offering seasonal flavors or limited-edition options.
- Create a website or social media presence: If you’re selling online, having an Instagram or Facebook page dedicated to your cake business is a great way to attract customers.
- Offer custom jars: Let customers choose their own flavors and decorations, or offer personalized messages on the jars.
- Bundle deals: Sell multiple jars together for events or as gift sets, making it easier for customers to purchase for gifts or parties.
Tips for Success
- Quality ingredients: Use the best ingredients you can afford for a high-quality product that will leave a lasting impression.
- Presentation matters: Packaging and labeling should be neat, attractive, and professional.
- Test different flavors: Experiment with different combinations to find what your customers love.
- Offer samples: If you’re selling at a market or event, offering samples is a great way to entice people to purchase.
Frequently Asked Questions (FAQ)
Q1: How long will cake in a jar stay fresh?
Cake in a jar can stay fresh for up to 3-5 days, depending on the fillings. Make sure to store the jars in a cool, dry place, or refrigerate if necessary.
Q2: Can I freeze cake in a jar?
Yes, you can freeze the cake layers separately and assemble the jars later. However, avoid freezing the frosting or fresh fruit.
Q3: How do I ship cake in a jar?
For shipping, pack the jars carefully with bubble wrap and ensure they are well-secured. You may also want to use insulated packaging if your cakes contain perishable fillings.
Q4: What are some creative flavors to try for cake in a jar?
Consider flavors like lemon, strawberry shortcake, mocha, or coconut. You can also experiment with different frostings and fillings like salted caramel or peanut butter.
Conclusion
Making cake in a jar is a creative and fun way to share your delicious cakes with others, whether for a special occasion or as a product to sell. By following these steps and tips, you’ll be able to bake, package, and present beautiful and tasty cake jars that are sure to impress. From choosing the right cake recipe to adding personal touches, cake in a jar is an innovative and profitable way to share your love for baking.