
Introduction
Layer cakes are a popular choice for birthdays, weddings, and celebrations, offering a beautiful way to showcase different flavors and fillings. However, assembling a multi-layered cake can be tricky, and many bakers struggle with layers that collapse, slide, or lean. A properly assembled layer cake is stable, with even layers and smooth frosting. In this guide, we’ll walk you through the essential techniques to assemble a layer cake that stays sturdy, looks professional, and doesn’t collapse under pressure.
Why Layer Cakes Collapse
Layer cakes collapse for a variety of reasons, most of which stem from improper assembly or insufficient support. Some common causes include:
- Uneven layers: If your cake layers are not level or uniform, the cake may lean or become unstable when stacked.
- Too much filling or frosting between layers: Overloading the layers with frosting or filling can cause the cake to sink.
- Lack of structural support: Without a solid foundation, the layers may shift or collapse, especially for larger cakes.
- Incorrect cooling: A warm or partially cooled cake may be more fragile and prone to collapsing when stacked or frosted.
Step-by-Step Guide to Assembling a Layer Cake
1. Level the Cake Layers
The first step to ensuring your layer cake is stable is to level the cake layers. After baking, cakes often have a domed top that can make stacking difficult. Use a serrated knife to trim off the domed top of each layer, making sure to keep the layers even. For large cakes, it may help to use a cake leveler tool for more precise results. Once the layers are level, they’ll stack neatly and evenly.
2. Crumb Coat the Cake
A crumb coat is a thin layer of frosting applied to the entire cake to trap loose crumbs. This prevents the crumbs from mixing into the final coat of frosting, resulting in a smooth finish. Apply the crumb coat generously over the top and sides of the cake, ensuring an even coverage. Once applied, refrigerate the cake for at least 20 minutes to allow the crumb coat to set. This helps the final layer of frosting go on smoothly without disturbing the crumb coat.
3. Use Cake Boards or Straws for Support
When assembling a multi-layer cake, it’s crucial to add structural support to prevent the layers from collapsing. For smaller cakes, you may not need additional support. However, for taller or heavier cakes, it’s essential to place a cake board or a piece of cardboard between each layer. For extra stability, you can use cake dowels or plastic straws cut to the height of the cake. Insert the dowels or straws into the cake before adding the next layer, ensuring the weight of the top layers is evenly distributed. This will prevent the bottom layers from buckling under pressure.
4. Add Frosting Between Layers
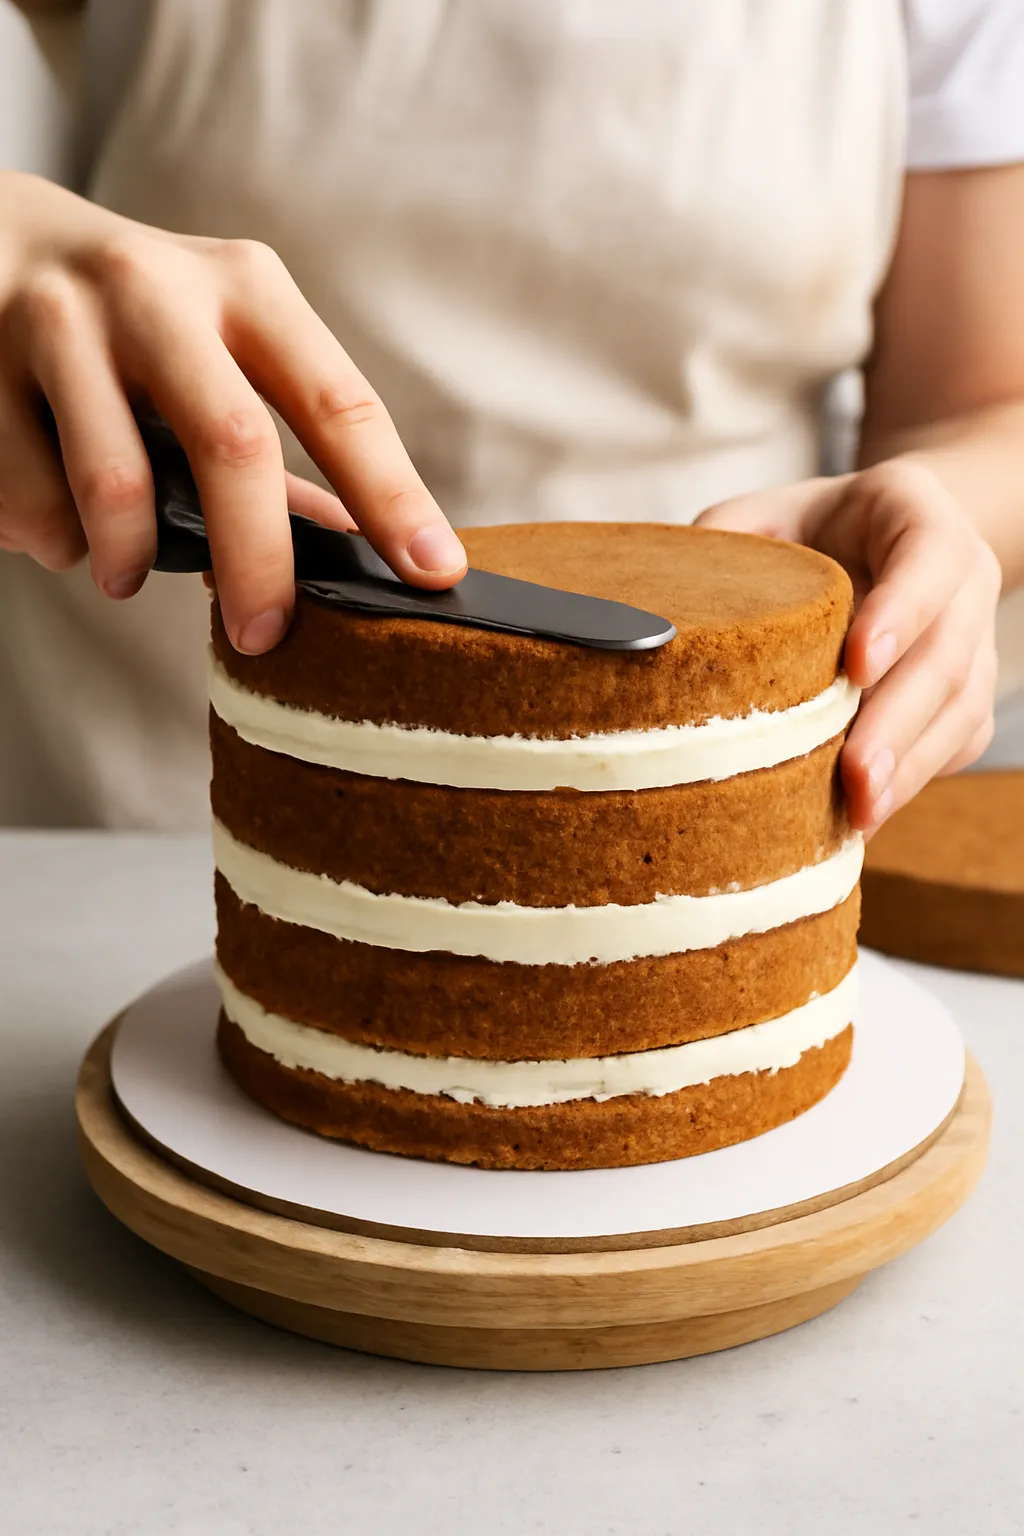
When frosting between layers, use a generous but controlled amount. Overfilling the layers with frosting can cause the cake to sink, especially if the frosting is too soft. A thick buttercream or ganache works well for creating a stable structure between layers. Spread the frosting evenly with an offset spatula, smoothing the surface before adding the next layer. Be mindful not to apply too much pressure when spreading the frosting, as this can cause the layers to shift.
5. Stacking the Layers
Once the layers are prepared and the frosting is applied, it’s time to stack them. Begin by placing the first layer on a cake board or serving platter. Gently press down to ensure it sticks. Add a layer of frosting or filling, and then place the second cake layer on top. Repeat for additional layers. When stacking, try to keep the layers centered and aligned, adjusting them as necessary to ensure an even, straight cake.
For taller cakes, you can use a rotating cake stand to help make the stacking process easier and more controlled. Rotate the cake as you carefully add layers and frosting, keeping the layers as even as possible.
6. Apply the Final Coat of Frosting
Once all layers are stacked, it’s time to apply the final coat of frosting. Start by applying a thick layer of frosting to the top and sides of the cake. Use an offset spatula to spread the frosting evenly, working from the center outward. For a smooth finish, use a bench scraper to gently scrape away excess frosting while rotating the cake. If you want a textured finish, use the back of a spoon or a different tool to create decorative swirls or patterns.
If your frosting is too soft or warm, it may cause the layers to slide or shift. Refrigerate the cake for 10–15 minutes before continuing if needed to firm up the frosting.
7. Chill the Cake for Stability
After assembling and frosting the cake, place it in the refrigerator for 20–30 minutes. This helps the frosting firm up and makes the cake easier to handle, especially if you need to transport it or apply additional decorations. If you’re planning to decorate the cake with fondant, it’s essential to let the frosting firm up first so the fondant doesn’t become too soft and sticky.
Extra Tips for a Stable Layer Cake
- Use the right size pans: Ensure you’re using the correct size pans for the recipe. A cake that is too tall may require extra support, while a short cake may be easier to assemble.
- Don’t stack too many layers: If you want a taller cake, consider adding another tier rather than stacking too many layers. Too many layers can make the cake unstable.
- Keep the cake refrigerated before serving: Especially in warmer weather, keep your layered cake chilled before serving to prevent the frosting from melting and the layers from shifting.
- Avoid adding too many heavy fillings: Fillings like fruit or custard are delicious, but they can make the cake heavy. Limit the use of dense fillings, and consider using lighter frostings or cream-based fillings.
Common Mistakes to Avoid
- Not cooling the cake fully before stacking: A warm cake is more likely to collapse or become unstable when stacked. Always allow the cake layers to cool completely before beginning the assembly process.
- Overfilling the cake with frosting: Adding too much frosting between layers can make the cake unstable. Use just enough to fill the layers without overwhelming them.
- Not using enough support: If your cake is tall, always use dowels or straws to support the layers and keep them from sinking or leaning.
- Rushing the chilling process: Always allow time for the cake to set and chill. This ensures the frosting hardens and the layers stay in place.
Practical Example: Assembling a Classic Vanilla Layer Cake
Imagine you’ve baked a classic vanilla layer cake with three layers. Start by leveling the tops of each layer and applying a crumb coat. After refrigerating for 20 minutes, apply a thick layer of buttercream frosting between each layer, using dowels for added stability. Once the layers are stacked, apply the final coat of frosting and smooth it out using a bench scraper. Chill the cake again for 15 minutes to ensure the frosting firms up before serving.
This technique creates a perfectly assembled, stable, and beautiful layer cake.
Frequently Asked Questions (FAQ)
Q1: How can I prevent my cake from leaning after stacking?
Make sure to level the cake layers, use a cake board for each layer, and insert dowels or straws for additional support.
Q2: How can I make a tall layer cake without it collapsing?
Use a sturdy base, chill the cake between frosting layers, and consider using additional layers for extra support.
Q3: Can I make a layered cake in advance?
Yes, you can assemble the layers ahead of time and refrigerate or freeze the cake for later. Just ensure the frosting is stable and firm before serving.
Q4: How do I apply frosting evenly to the sides of a layered cake?
Use an offset spatula to apply frosting in a smooth, even layer. For a perfectly smooth finish, use a bench scraper.
Q5: What’s the best way to store a layered cake?
Store the cake in an airtight container or under a cake dome at room temperature for up to 2–3 days. If the cake has perishable fillings, refrigerate it.
Conclusion
Assembling a layer cake without collapsing requires careful attention to detail, from leveling the layers to using proper support and chilling the cake for stability. By following these steps and tips, you can achieve a perfectly stacked cake that is both beautiful and stable. Whether you’re creating a simple birthday cake or a more intricate layered design, these techniques will help you avoid common pitfalls and ensure your cakes stay intact and delicious.